Stonehenge Model
The Model of Stonehenge
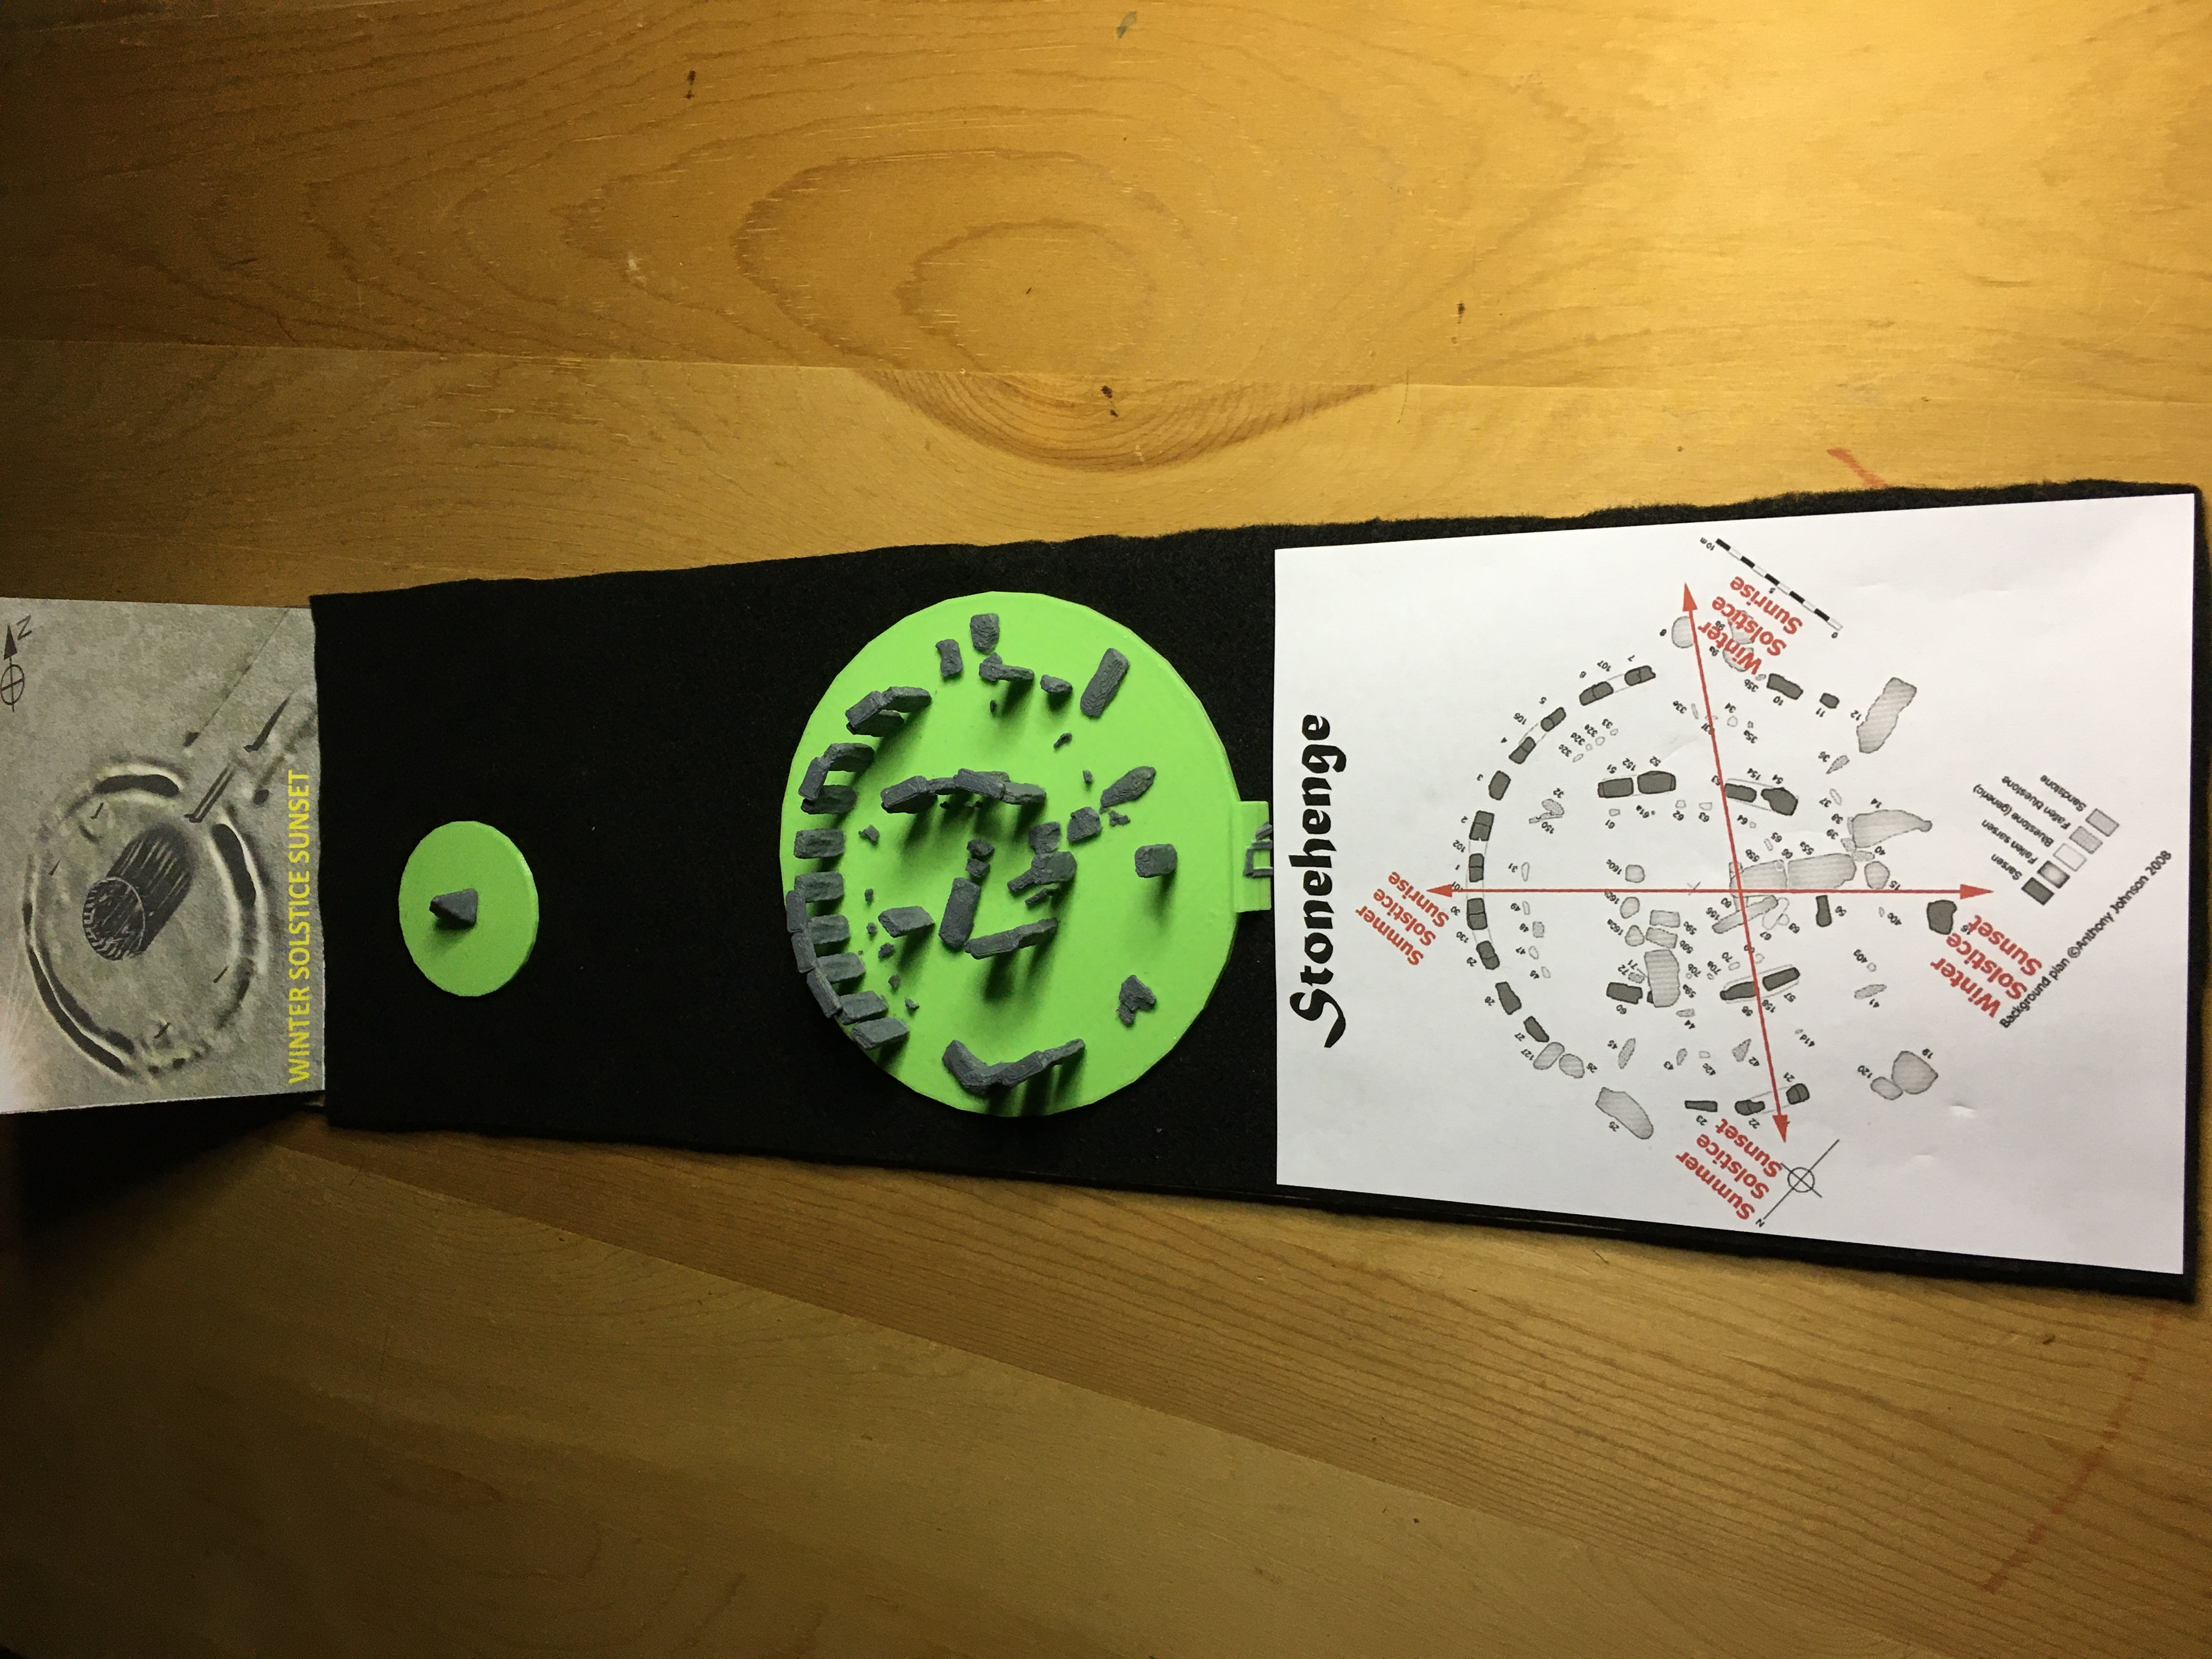
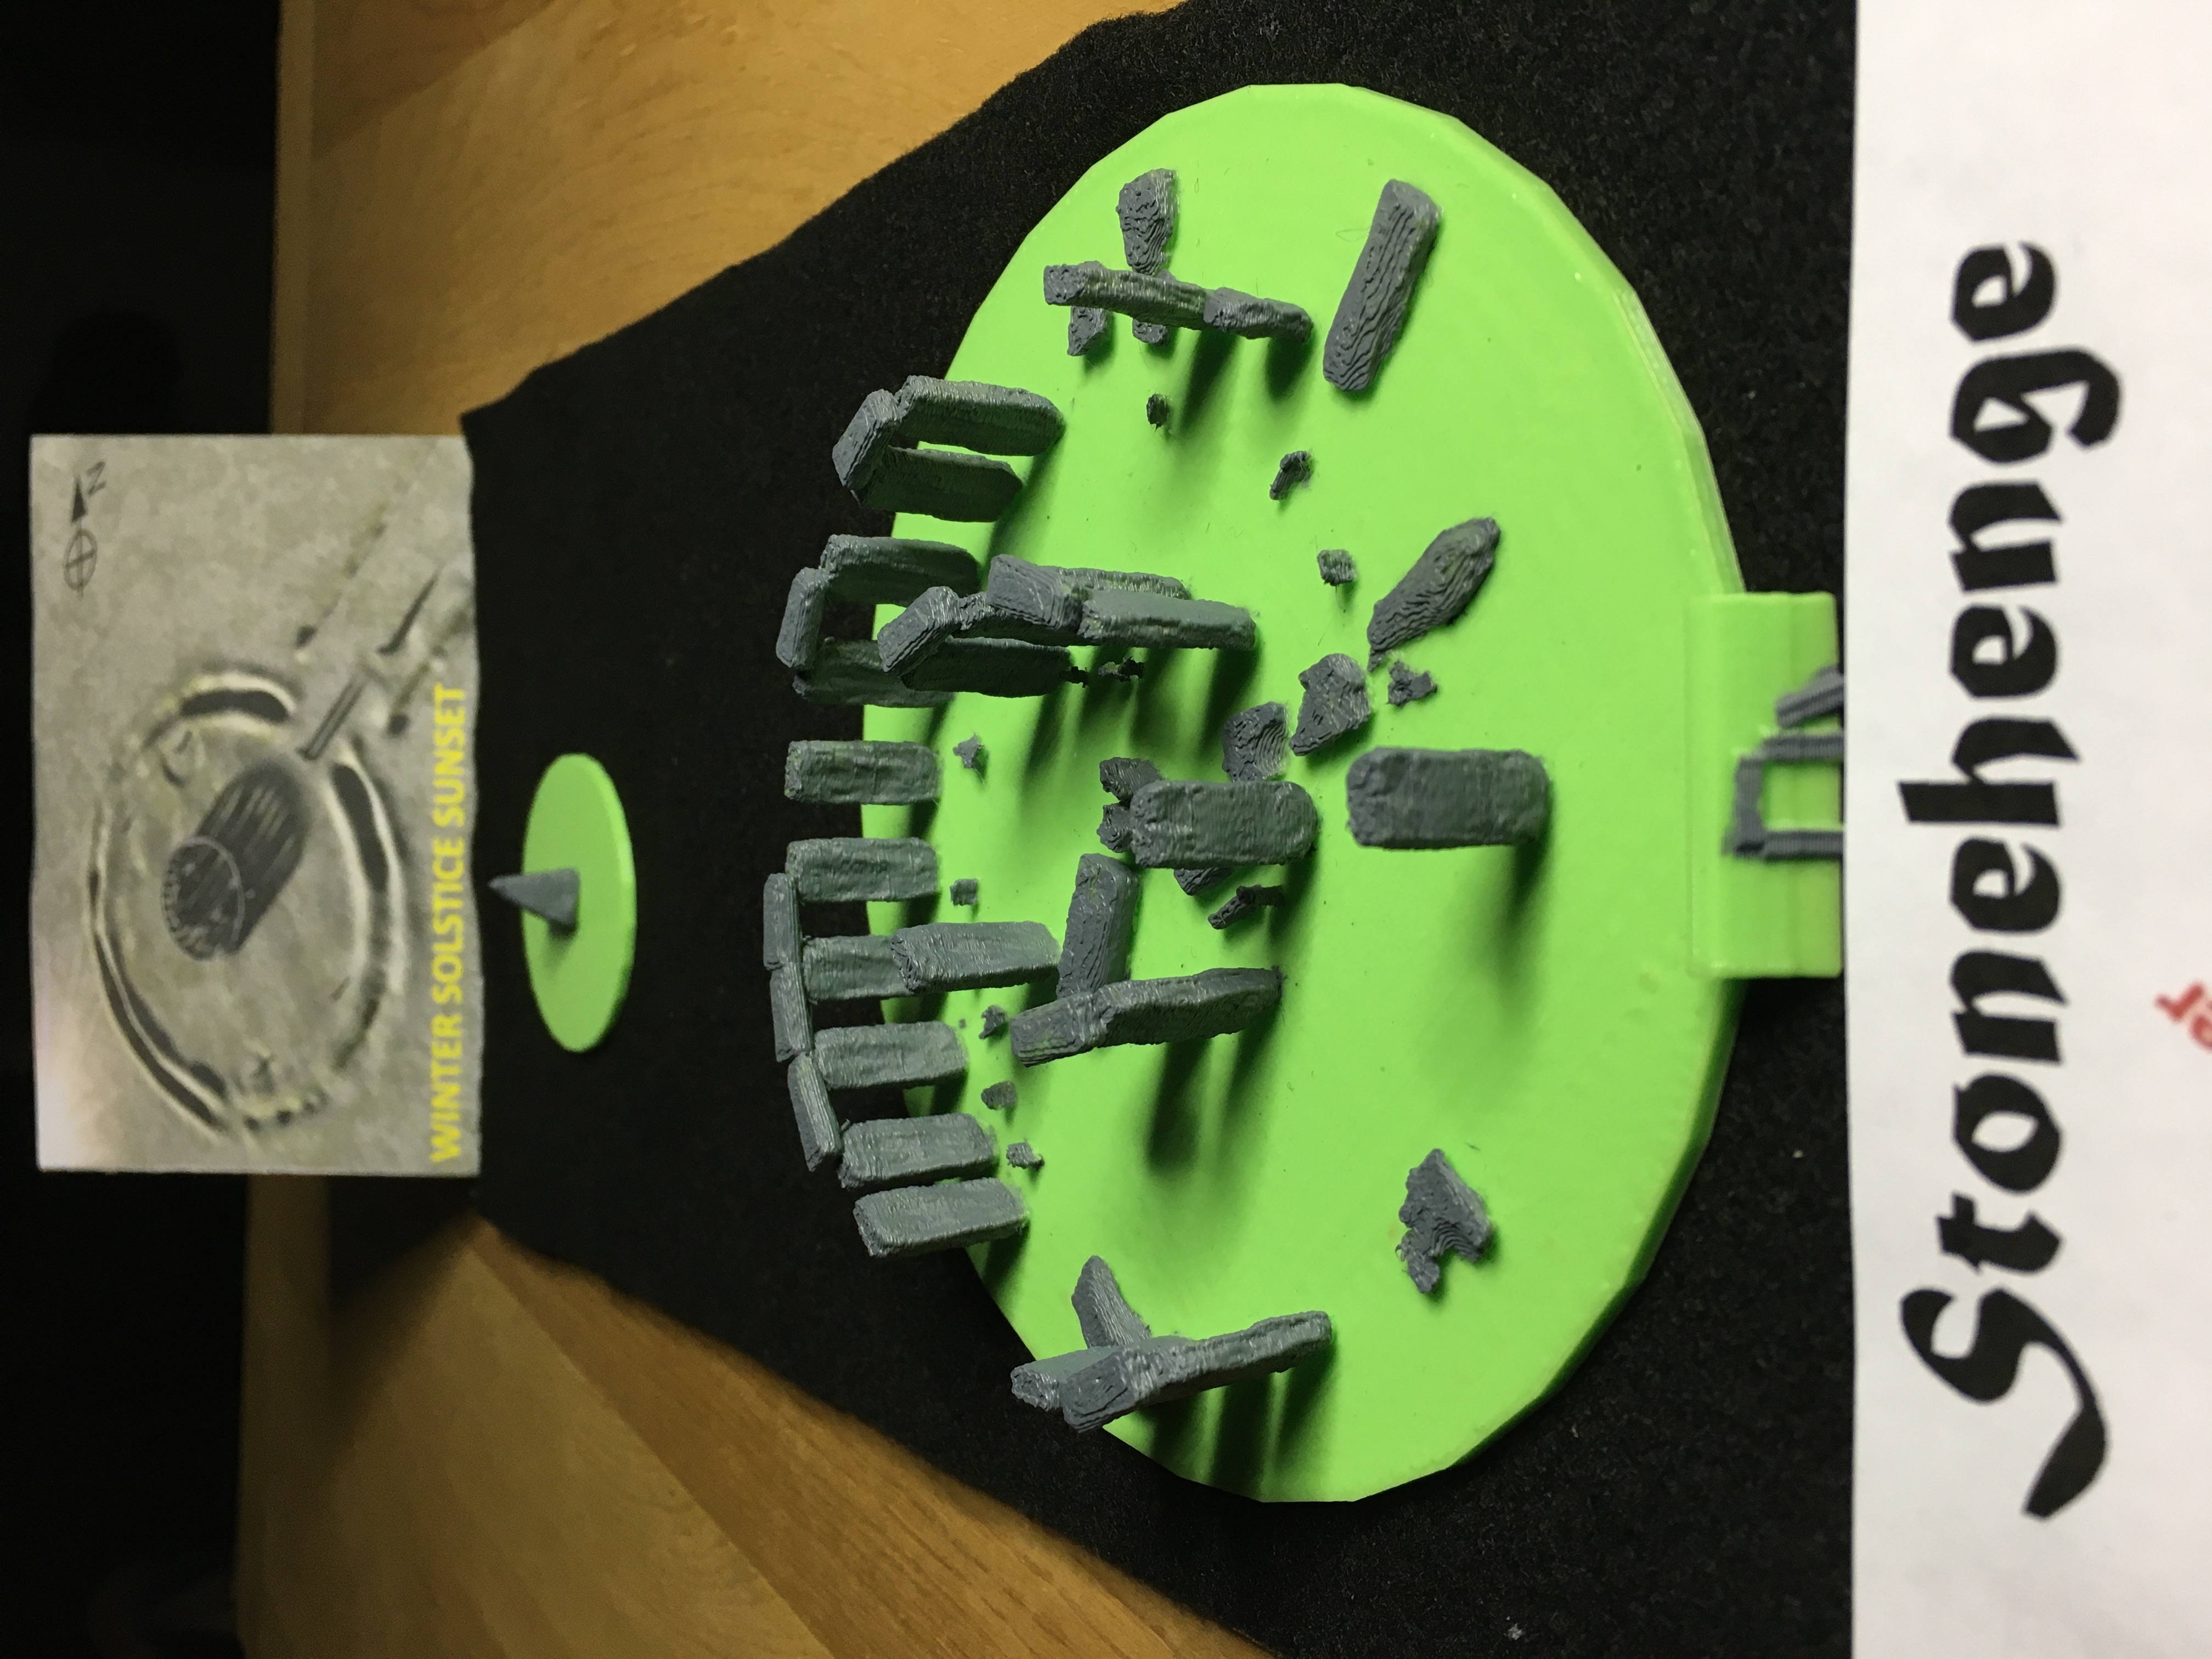 Stonehenge is the perfect thing to bring to a Winter Solstice party. Unfortunately, the Brits wouldn't let me have it for a night. It wouldn't fit in my car anyhow. So I found a suitable replacement on Thingiverse. The 3D model referenced in the parts list is one of the most accurate that you will find. The creator likely used original documents like these to place and size the stones. Of course, no model would be complete without the Heel Stone. The sun sets behind Stonehenge, aligned with this stone at Winter Solstice. At Summer Solstice, it rises over the stone when viewed from Stonehenge. I have a Heel Stone 3D model you can add to the display. A handy information sheet will provide you with enough facts to catch any conversation interested party goer.
The Parts
A handy tool for demonstrating this can be made from some items you may have on a shelf or closet.
Here's the parts list:
- Stonehenge STL file at Thingiverse
- Heel Stone STL file
- 3D printer, or access to one
- PLA filament (I used green because that's what I had)
- Mounting board 130 mm wide x 550 mm long (Masonite, plywood, etc.)
- Felt (Black or what ever color you would like)
- White glue
- Gray enamel paint (Plastic model aircraft paint works, aka Testors)
- Fine point paint brush
- Printer, scissors
- Small flashlight
- Stonehenge Info Sheet
The Assembly
- Download and print the Stonehenge model and the Heel Stone
- Cut a board to fit the width of your model
- Cut your felt to fit the board and glue it to the board
- Carefully paint the stones with the gray paint
- Print the simulation of Winter Solstice and fold it to rest behind the model
- Print the Stonehenge solstice direction sheet and attach the front of the board
- Place the Stonehenge model and the Heel Stone on the board. Carefully align these as shown in the photos. You should be able to sight across the Heel Stone and directly into the back, center of the upright stones.
- Glue the model parts to the felt
- Sit back and enjoy
Just for reference, here's my dimensions:
Diameter of Stonehenge print: 128 mm (About 30 meter central stone circle in reality)
Center of Stonehenge to Heel Stone: 170 mm (About 76 meters if you paced it off)
There are a number of ways to get creative with this model. This will at least get you started.
The Use
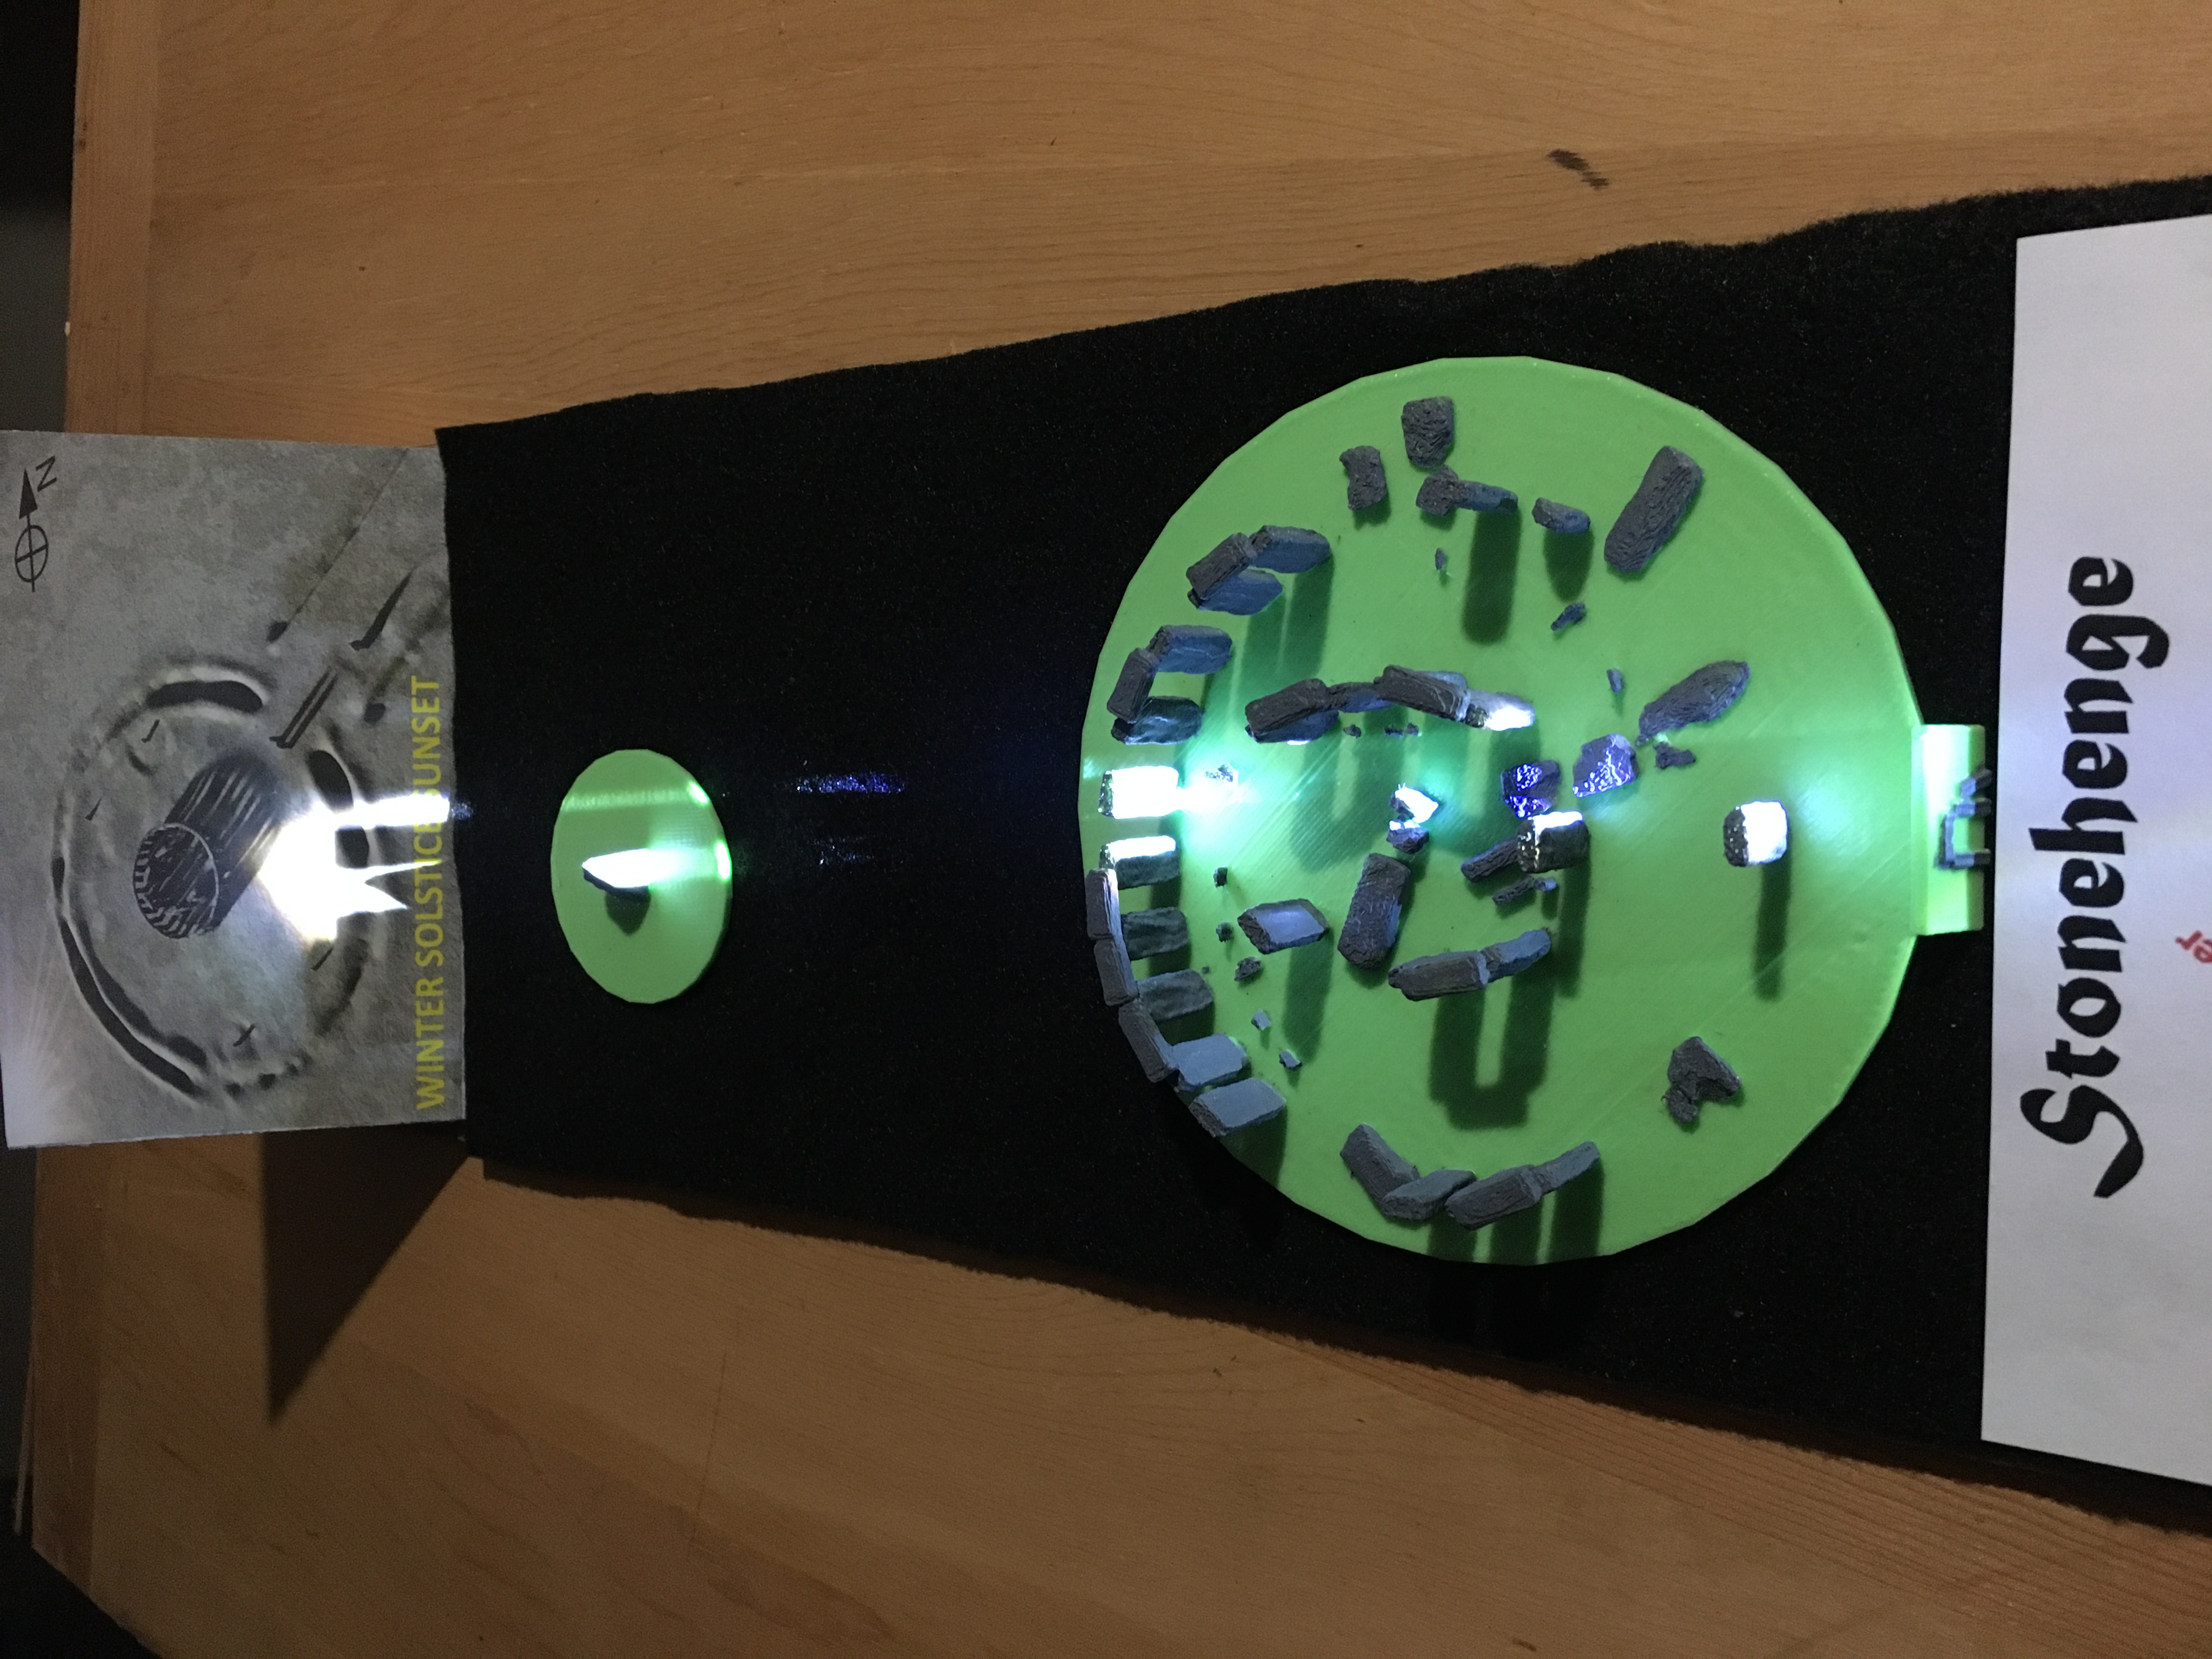 One of the more dramatic features is the sun alignment. Take a piece of paper or cardboard and punch a small hole in the center. Attach this to the front of your flashlight. You now have a thin beam of light to illustrate the Winter Solstice sunset. Point the flashlight over the Heel Stone toward Stonehenge to demonstrate the sunset. Reference my Stonehenge Info Sheet. This is now something that you can take to the next Solstice party, and it will fit in your car.
tarrow@roadrunner.com